
Safety Precautions and Guidelines
Always wear safety glasses and tie back long hair. Avoid loose clothing and keep hands clear of moving parts. Secure the workpiece firmly before drilling. Follow recommended speed settings and read the manual thoroughly. Proper safety measures prevent accidents and ensure efficient operation.
1.1. General Safety Instructions
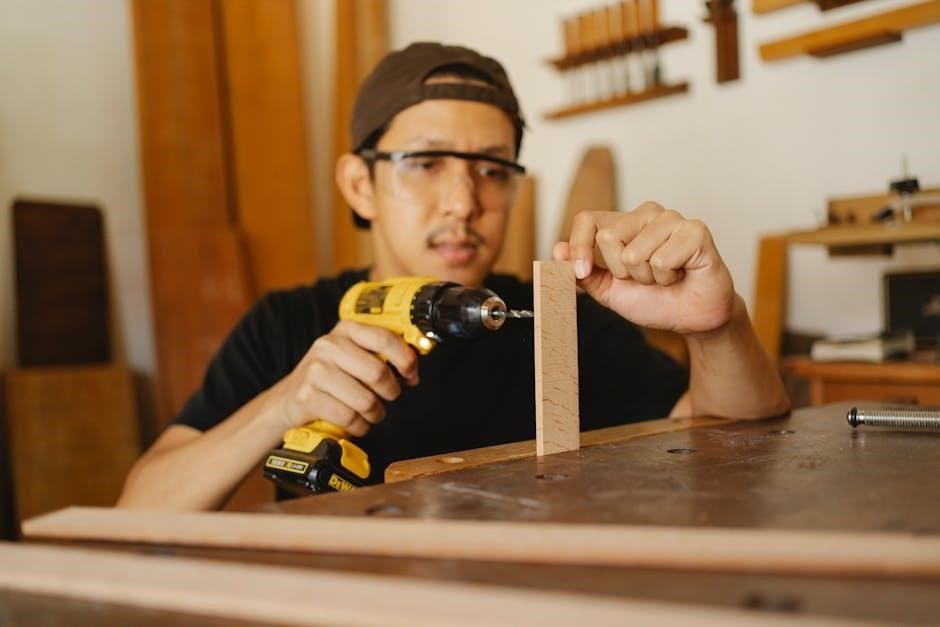
Always wear safety glasses and ensure long hair is tied back. Avoid loose clothing that could get caught in moving parts. Keep hands and fingers away from the drill bit and spindle during operation. Secure the workpiece firmly using clamps or a vise to prevent it from moving unexpectedly. Never operate the drill press while fatigued or under the influence of substances that impair judgment. Ensure proper ventilation in the workspace‚ especially when drilling materials like metal or treated wood. Follow the manufacturer’s speed recommendations for specific materials to avoid damage or unsafe conditions. Regularly inspect the machine for worn or damaged parts and address issues promptly. Always disconnect the power source before performing maintenance or repairs. Adhere to these guidelines to ensure safe and efficient operation.
1.2. Emergency Procedures
In case of an emergency‚ immediately disconnect the power source to halt the drill press. If a workpiece becomes loose or jammed‚ switch off the machine and carefully remove the piece. For injuries‚ apply first aid and seek medical attention if necessary. If the drill bit breaks‚ turn off the machine and let it come to a complete stop before assessing the damage. Do not attempt to remove broken bits while the machine is in motion. Keep a fire extinguisher nearby and ensure the area is clear of flammable materials. Regularly review emergency procedures to ensure preparedness. Always prioritize safety and take immediate action to prevent further incidents. Stay calm and follow established protocols to handle any unexpected situation effectively.
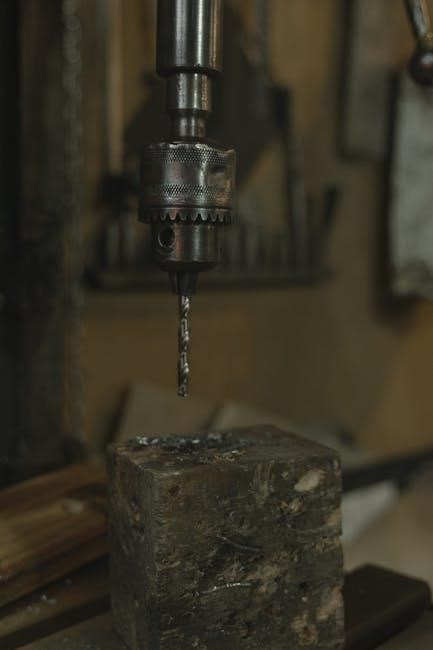
Understanding Drill Press Components
Familiarize yourself with the drill press’s key components‚ including the motor‚ spindle‚ chuck‚ and worktable. Refer to the parts diagram for identification and operation guidance.
2.1. Key Features and Parts Identification
The drill press features a robust motor‚ adjustable spindle‚ and a precision chuck for secure drill bit mounting. The worktable is durable and tilts for angled drilling. Key components include the quill‚ which houses the spindle and chuck‚ and the variable speed control. Refer to the parts diagram for identification. The quill feed handle controls vertical movement‚ while the worktable adjusts for height and angle. Familiarize yourself with these features to optimize drilling accuracy and efficiency. Proper identification ensures safe and effective operation‚ aligning with the manual’s guidelines for setup and use. Understanding each part’s function enhances overall performance and maintenance.
2.2. Motor Specifications and Speed Control
The drill press is equipped with a powerful induction motor‚ typically rated at 1.5kW‚ operating at 110V and 60Hz. It delivers adjustable speed settings‚ ranging from 620 to 3100 RPM‚ allowing precise control for various materials. The variable speed control enables smooth transitions‚ while the step pulley system ensures consistent performance. Refer to the built-in speed chart for optimal settings. Proper motor maintenance‚ including regular lubrication‚ is essential for longevity. Always consult the manual for specific motor details and operational guidelines to ensure safe and efficient drilling. Understanding these specifications enhances your ability to utilize the drill press effectively for different tasks and materials.
Setting Up and Assembling the Drill Press
Begin by carefully unpacking and inspecting all components for damage. Place the base on a stable surface and assemble the quill and spindle. Follow manual instructions to install the drill chuck and downfeed handles securely. Tighten all clamp handles and ensure proper alignment before use. Refer to the provided diagrams for guidance. Proper assembly ensures optimal performance and safety during operation.
3;1. Unpacking and Initial Inspection
Carefully unpack the drill press from its packaging‚ ensuring all components are included and undamaged. Inspect each part for signs of wear or damage‚ such as dents‚ cracks‚ or missing pieces. Check the motor‚ spindle‚ and table for proper alignment and functionality. Verify that all screws‚ bolts‚ and handles are securely tightened. If any damage or missing items are found‚ contact the supplier immediately; A thorough inspection ensures safe and efficient operation. Refer to the manual’s parts list to confirm all components are accounted for. Proper unpacking and inspection are crucial for optimal performance and longevity of the drill press.
3.2. Installing the Drill Chuck and Downfeed Handles
To install the drill chuck‚ align it with the spindle keyway and gently tap it into place using a rubber or wooden mallet. Ensure the chuck is securely seated and tighten it firmly. For the downfeed handles‚ thread them into the spindle hub as shown in the manual. Tighten all handles securely to prevent any movement during operation. Double-check that the chuck does not rotate independently of the spindle. Proper installation ensures smooth operation and prevents accidents. Always refer to the manual for specific torque recommendations and alignment guidelines. Ensure all components are tightly fastened before first use. This step is critical for safe and efficient drilling operations.
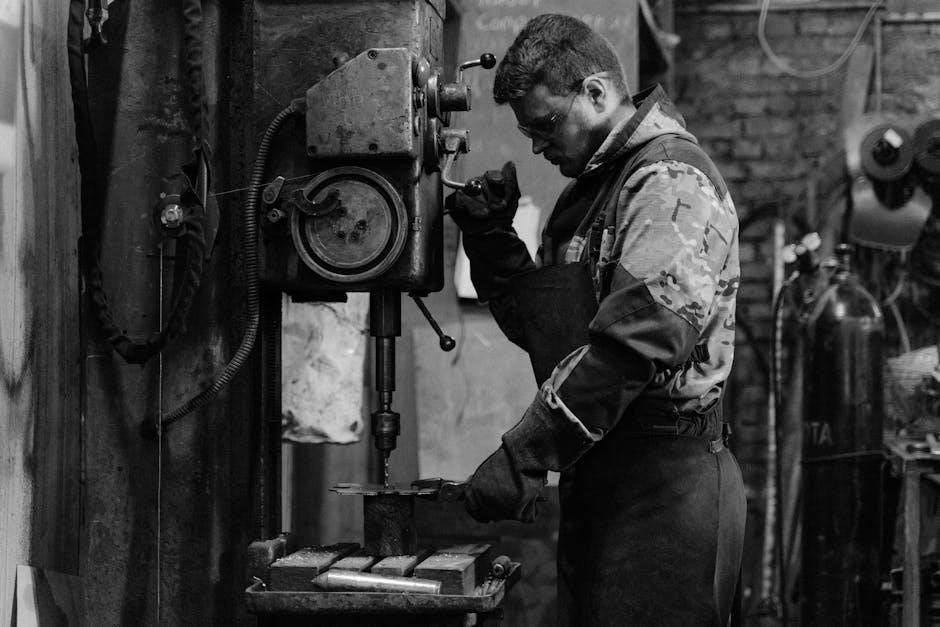
Operating the Drill Press
Select the correct drill bit and speed for the material. Secure the workpiece firmly on the table. Ensure all handles are tightened before starting. Operate smoothly.
4.1. Selecting the Correct Speed and Drill Bits
Consult the built-in speed chart on the drill press for recommended settings based on material type. Choose the appropriate drill bit for the job‚ ensuring compatibility with the workpiece material. For metal‚ use high-speed steel or carbide-tipped bits‚ while wood and plastic require spurs or Forstner bits; Always match the drill bit size to the task to avoid damage or inaccuracy. Proper speed selection prevents overheating and extends tool life. Adjust the belt or variable speed control as needed. Ensure the drill chuck is securely tightened before operation. Using the right speed and bit ensures precise‚ efficient drilling and minimizes the risk of accidents or equipment damage.
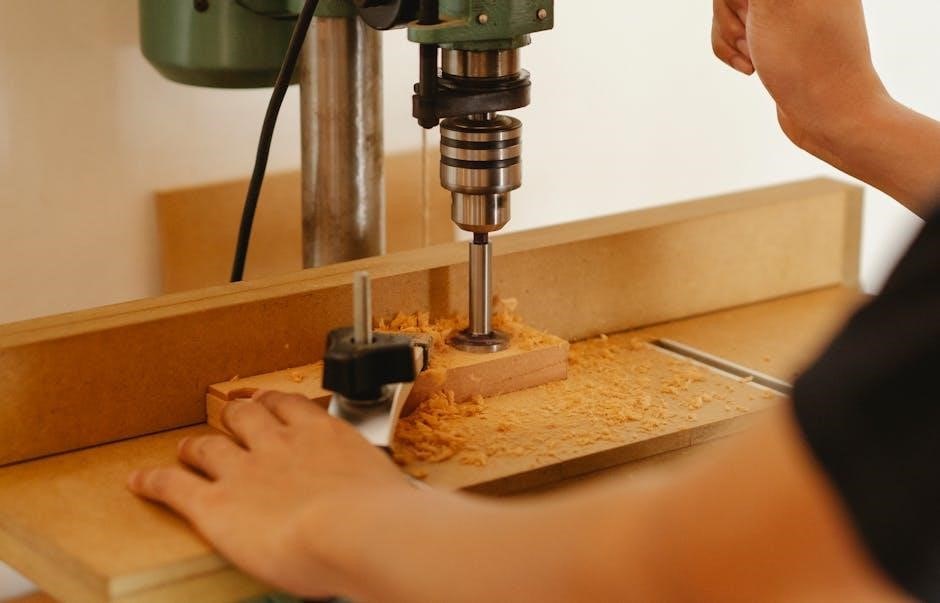
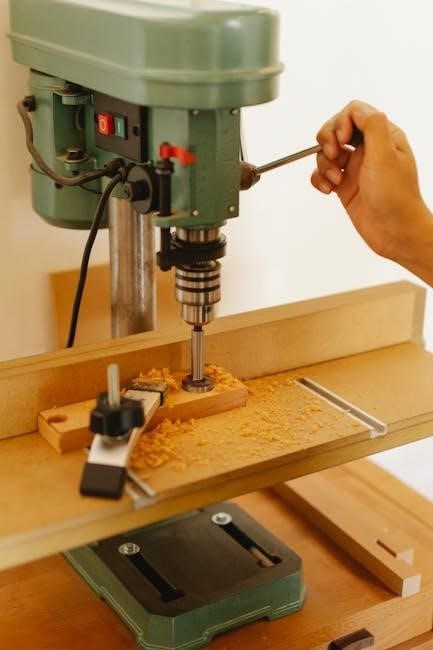
4.2. Securing the Workpiece and Drilling Techniques
Always secure the workpiece using clamps or a vise to prevent movement during drilling. Ensure the vise is tightly fastened to the table. Use a drill press vise for precise alignment and stability. For freehand drilling‚ avoid holding the workpiece manually. Maintain a firm grip on the drill press handles and apply steady‚ consistent pressure. Start with a pilot hole to guide the drill bit accurately. Use a slower speed for larger bits to maintain control. Keep the workpiece flat and aligned with the spindle. Proper clamping prevents vibration and ensures straight‚ precise holes. Regularly inspect the workpiece and tools to avoid accidents and achieve professional results. Always follow safety guidelines for optimal performance.
Maintenance and Troubleshooting
Regularly lubricate moving parts and inspect for wear. Check alignment and tighten loose components. Address vibrations by balancing parts. Consult the manual for repair solutions.
Regular maintenance ensures optimal performance and longevity of the drill press. Lubricate all moving parts‚ such as the spindle and gears‚ with high-quality machine oil. Inspect belts and pulleys for wear and replace them if damaged. Check the alignment of the drill bit and table regularly. Clean the machine thoroughly after each use to prevent dust buildup. Always refer to the manual for specific lubrication intervals and recommended products. Proper care prevents rust and ensures smooth operation. Schedule maintenance monthly or as needed based on usage. A well-maintained drill press operates efficiently and safely. Common issues with drill presses include misalignment‚ excessive vibration‚ and worn-out parts. For misalignment‚ check and adjust the spindle and table alignment. Excessive vibration may result from unbalanced parts or loose belts; tighten or replace them as needed. Worn-out chuck keys or drill bits can cause poor performance; replace them promptly. If the motor overheats‚ ensure proper ventilation and reduce workload. For faulty speed control‚ consult the manual or contact a professional. Regular maintenance can prevent many issues. Always disconnect power before attempting repairs. Addressing problems early ensures smooth operation and extends the tool’s lifespan. Refer to the troubleshooting guide in the manual for detailed solutions. Advanced drilling techniques enhance precision and efficiency. For angled drilling‚ use an adjustable drill press vise or tilting table. When drilling deep holes‚ use coolant to prevent overheating and maintain tool longevity. Precision drilling requires using high-quality‚ sharp bits and maintaining consistent feed rates. For large or irregular shapes‚ employ jigs or templates to guide the drill. Utilize the variable speed function to optimize drilling for different materials. Practice these methods to achieve professional-grade results. Always refer to the manual for specific settings and guidelines. Mastering advanced techniques expands the drill press’s versatility and ensures superior outcomes in various projects.5.1. Regular Maintenance and Lubrication
5.2. Common Issues and Repair Solutions

Advanced Drilling Techniques